
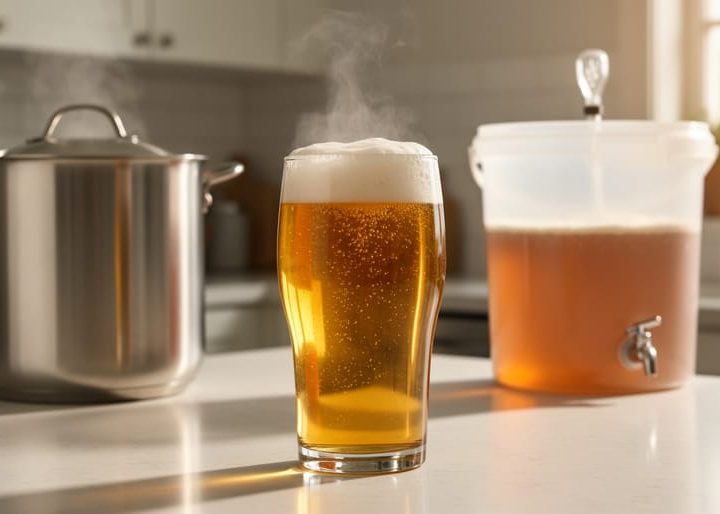
That first sip of beer you brewed yourself tastes different. Not because the recipe was revolutionary or because you stumbled onto some secret technique, but because you made it happen. You took water, grain, hops, and yeast and transformed them into something alive, something drinkable, something worth sharing with friends who’ll ask dozens of questions about your new obsession.
Homebrewing isn’t nearly as complicated as the craft beer industry sometimes makes it look. Yes, professional brewers work with gleaming stainless steel systems and laboratory-grade quality control. But brewers have been making exceptional beer in their kitchens, garages, and basements for thousands of years using equipment you probably already own. The gap between wanting to brew and actually brewing your first batch is smaller than you think.
What stops most people isn’t the process itself. It’s the intimidation factor. Walk into any homebrew shop and you’ll face walls of equipment, shelves of ingredients, and often a helpful but overly enthusiastic staff member who assumes you know what a mash tun does. Online forums overflow with debates about water chemistry and fermentation temperatures that make brewing sound like advanced chemistry. But here’s what the veterans know: you can make genuinely good beer with basic equipment, a simple recipe, and attention to cleanliness.
This guide strips away the complexity and gives you the complete path from empty pot to full glass. You’ll learn what equipment actually matters for your first batch, how the brewing process works without requiring a biology degree, and which mistakes to avoid based on what thousands of homebrewers learned the hard way. By the end, you’ll have everything needed to brew confidently, understand what’s happening inside your fermenter, and know exactly when your beer is ready to drink.
Why Homebrewing Is Easier Than You Think
Here’s the truth that professional brewers have known for centuries: beer wants to happen. The fundamental transformation from grain to glass isn’t some arcane mystery requiring years of apprenticeship. It’s a natural process you’re simply guiding along.
At its core, brewing is remarkably straightforward. You’re extracting sugars from malted grain, boiling that sweet liquid with hops for flavor and preservation, then letting yeast convert those sugars into alcohol and carbon dioxide. That’s it. The yeast fermentation process handles the heavy lifting while you wait, transforming your wort into beer over the course of a week or two.
The science might sound intimidating, but think of yeast as millions of tiny workers clocking in for their shift. Feed them sugar in a clean environment with the right temperature, and they’ll reliably produce alcohol, carbon dioxide, and all those complex flavor compounds that make beer taste like beer. You don’t need a microbiology degree to understand that yeast are hungry and predictable.
What’s changed the game for beginners is the quality of modern equipment. Twenty years ago, homebrewers improvised with modified coolers and cobbled-together systems. Today, you can buy purpose-built starter kits with everything pre-measured and clearly labeled. Plastic fermenters now come with built-in spigots. Digital thermometers replace guesswork. One-gallon batch kits let you experiment without committing to five gallons of potential mistakes.
The brewing community has also refined techniques specifically for newcomers. Extract brewing skips the all-grain mashing process entirely, giving you pre-concentrated malt syrup that dissolves right into hot water. No temperature rests to monitor, no stuck sparges to troubleshoot. You’re essentially making hop tea, then adding yeast.
Even failures teach you something tangible. Too warm during fermentation? You’ll taste those fruity esters next time and adjust. The feedback loop is fast, forgiving, and genuinely educational in ways few hobbies offer.
Essential Equipment: What You Actually Need (And What You Don’t)
Starting With a Beginner Kit vs. Piecing It Together
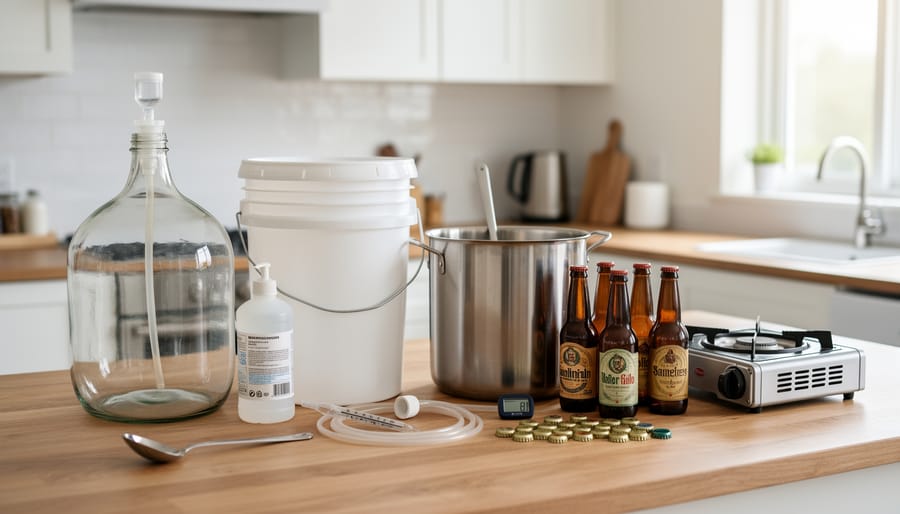
When you’re standing in a homebrew shop for the first time, the sheer volume of equipment can feel overwhelming. Should you grab a complete starter kit or handpick each component? The answer depends on both your budget and how committed you are to the hobby.
Sarah Mitchell, owner of Grain & Grape Homebrew Supply in Portland, sees this dilemma daily. “For absolute beginners, I recommend starter kits nine times out of ten,” she explains. “The mental bandwidth saved by not researching every single piece of equipment is worth the slight premium you might pay.” Quality starter kits typically run between $100-$150 and include everything needed for your first batch: a fermenter, airlock, bottling equipment, sanitizer, and often ingredient kits. The peace of mind knowing these components work together seamlessly is invaluable.
However, piecing together your own setup makes sense in specific situations. If you already own certain items like large pots or have inherited equipment from another brewer, building your kit piece by piece saves money. Marcus Chen, who manages three homebrew shops across Denver, points out another advantage: “Buying individual components lets you invest more in what matters. Maybe you want a higher-quality fermenter but don’t need fancy bottle caps yet.”
The financial difference? Building your own setup carefully can save 20-30%, but requires significant research time. Consider your learning style. Do you love deep-diving into specifications, or would you rather start brewing immediately? There’s no wrong answer.
The Cleanliness Question: Sanitization Tools That Matter
Here’s the hard truth every brewer learns eventually: you can follow the perfect recipe, use premium ingredients, and nail your temperatures, but if your equipment isn’t properly sanitized, you’re making something closer to vinegar than beer. One rogue colony of bacteria or wild yeast can turn weeks of effort into drain pour.
The professional brewing community has a saying: “Brewers make wort, yeast makes beer.” But there’s an unspoken addition: contamination makes disappointment. Visit any local brewery and you’ll notice their obsession with cleanliness borders on fanatical. That same discipline applies at home.
Star San remains the gold standard among homebrewers. This acid-based, no-rinse sanitizer works in under a minute and won’t harm your beer if small amounts carry over. Mix it according to package directions in a spray bottle for quick equipment touch-ups between steps. Many brewers keep a bucket of Star San solution throughout brew day, dunking anything that touches the cooled wort.
Iodophor offers another reliable option, though it requires a rinse and longer contact time. Some old-school brewers still swear by bleach solutions, but the rinsing requirements and potential for off-flavors make it less convenient.
Here’s what matters: sanitize everything that contacts your beer after the boil. Fermenter, airlock, siphon, bottles, caps. Everything. The boil sterilizes your wort, but from that point forward, you’re the last line of defense against contamination. That spray bottle of Star San becomes your most-used piece of equipment, and honestly, that’s exactly how it should be.
Choosing Your First Recipe: Extract vs. All-Grain Brewing
Three Foolproof Styles for Your First Brew Day
Your first homebrew should inspire confidence, not anxiety. That’s why experienced brewers consistently recommend starting with styles that forgive minor temperature fluctuations, timing imperfections, and the inevitable learning curve. Three styles stand out as ideal launchpads for your brewing journey.
Pale ale remains the gold standard for first-time brewers. The style’s moderate alcohol content (typically 4.5-6% ABV) means a straightforward fermentation that won’t stress your yeast. You’ll work with aromatic American hops like Cascade or Centennial, which provide immediate sensory feedback about freshness and proper handling. If your fermentation temperature drifts a few degrees, pale ale yeast strains won’t throw off-flavors that ruin the batch. Plus, the style’s popularity means you can easily compare your results against commercial examples to calibrate your palate.
Amber ale offers similar forgiveness with added malt complexity. The caramel and toasted flavors from specialty grains help mask minor flaws while you’re perfecting your technique. Many brewers find amber’s balanced profile more interesting than pale ale without adding significant difficulty. The slightly higher malt bill creates a fuller body that can cover small fermentation quirks.
Brown ale deserves special mention for its remarkable resilience. The rich, nutty malt character tolerates a wider range of fermentation temperatures than lighter styles. You’re also less likely to notice slight oxidation issues that might affect paler beers. English brown ale variants use less hops, simplifying your ingredient management and reducing one potential variable.
Talk to brewers at your local homebrew shop about which of these three they started with. Their experiences will help you choose based on available ingredients and your personal taste preferences.
The Brew Day Timeline: What Actually Happens
Temperature Control: Your Secret Weapon
Here’s a truth that separates mediocre homebrew from exceptional beer: temperature control matters more than almost anything else in your brewing setup. While you don’t need a temperature-controlled fermentation chamber right away, understanding why those numbers matter will transform your results.
During mashing, those crucial 60 to 90 minutes determine your beer’s body and alcohol potential. A mash at 148°F produces a drier, more fermentable wort, while 158°F creates fuller-bodied beer with more residual sweetness. Just a few degrees make that difference. Most brewers find success within mashing temperature ranges of 150-155°F, and maintaining consistency here is simpler than you’d think. Wrap your mash tun in old blankets or sleeping bags. Check it every 20 minutes.
Fermentation temperature control is where most homebrewers see dramatic improvement. Ale yeasts perform beautifully between 65-72°F, but exceed that range and you’ll get fruity esters that overwhelm your carefully planned recipe. One local homebrewer I know transformed his beers overnight by simply placing his fermenter in a plastic tub filled with water. During warmer months, he rotates frozen water bottles twice daily. It’s low-tech but remarkably effective.
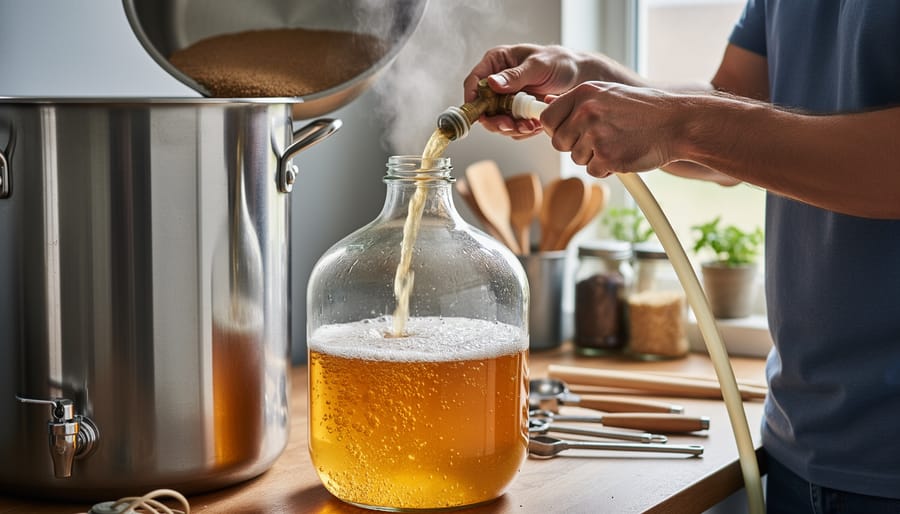
The cooling stage after boiling deserves attention too. Getting your wort from 212°F down to pitching temperature quickly reduces infection risk and improves clarity. An ice bath works perfectly fine for five-gallon batches.
When Things Don’t Go According to Plan
Let’s be honest: your first brew day probably won’t be picture-perfect, and that’s completely normal. Every brewer in the community has a story about their early disasters, and those mishaps often become the best learning experiences.
Boilovers rank among the most common and dramatic problems. You turn your back for thirty seconds, and suddenly your kitchen looks like a sticky, hoppy crime scene. The fix is simple: watch your kettle during the hot break (those first few minutes after boiling starts), reduce heat slightly, and keep a spray bottle of water handy to knock down excessive foam. Many brewers swear by Fermcap-S, an anti-foaming agent that prevents this mess entirely.
Temperature troubles plague beginners too. Missed your mash temperature by ten degrees? Don’t panic and dump everything down the drain. A hotter mash produces a fuller-bodied beer, while cooler temperatures create a drier finish. You might not get the exact beer you planned, but you’ll still get beer. One member of our local homebrew club accidentally mashed at 162°F instead of 152°F and ended up with a surprisingly delicious, chewy stout.
Equipment failures happen. Burners quit mid-boil, thermometers break, siphons refuse to start. Keep backup plans ready: a second thermometer, sanitized tubing, even your kitchen stove as emergency heat. The brewing community thrives on problem-solving, and you’ll find creative solutions everywhere you look.
Remember, even professional brewers experience off days. The difference between a good brewer and a great one isn’t avoiding problems but learning to adapt when they inevitably arrive.
Fermentation: The Waiting Game That Makes or Breaks Your Beer
Reading the Bubbles: What Your Airlock Is Telling You
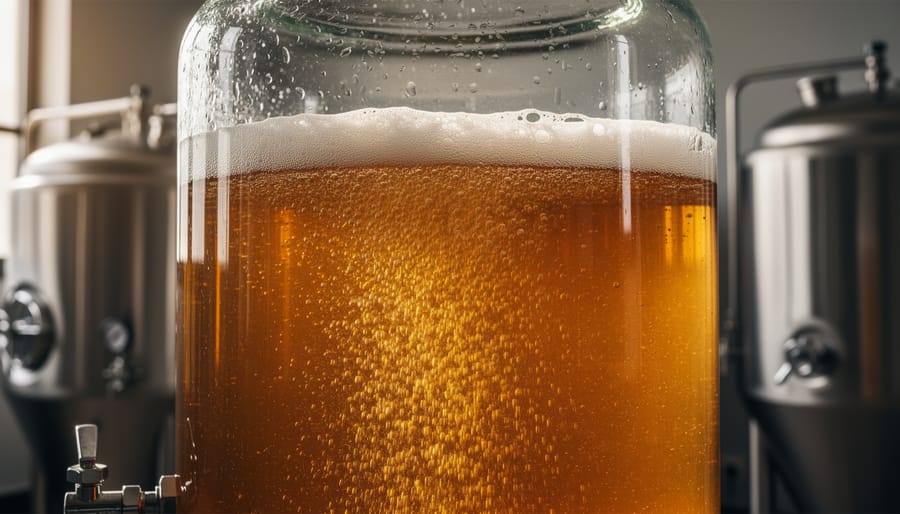
Your airlock is like a conversation with your beer, and learning its language transforms you from an anxious beginner into a confident brewer. Within 12 to 24 hours of pitching yeast, you’ll notice those first hesitant bubbles. This is kraeusen forming, the thick foam layer that signals fermentation has begun.
During primary fermentation, expect vigorous activity. Some batches bubble every few seconds, creating a rhythmic soundtrack to your brewing journey. Others are quieter, especially if you’ve pitched adequate yeast or your fermentation chamber runs cooler. Don’t panic if your friend’s pale ale bubbles like champagne while yours seems serene. Temperature, yeast health, and even your airlock’s water level affect bubble frequency.
Around day three to five, activity naturally slows. This is normal, not a crisis. Your yeast is finishing its work, converting those final sugars. By day seven to ten, you might see one bubble every minute or two.
The real concern? No activity after 48 hours combined with unchanged gravity readings. That suggests stuck fermentation or dead yeast. But a slowing airlock after initial vigor? That’s just your beer telling you it’s maturing beautifully, right on schedule.
Bottling Day: Turning Beer Into Something Shareable
How Long Until You Can Actually Drink It?
Patience becomes your best friend once fermentation wraps up. After bottling, your beer needs at least two weeks at room temperature to carbonate properly. During this period, the remaining yeast consumes the priming sugar you added, creating those satisfying bubbles. Some homebrewers sneak a taste after ten days, but carbonation rarely reaches its full potential that quickly.
Here’s where conditioning transforms good beer into great beer. Most ales hit their stride around three to four weeks after bottling. The flavors meld together, any harsh edges soften, and the carbonation settles into a pleasant, drinkable balance. Lagers and higher-gravity beers reward patience even more generously, often improving for two to three months.
Try this approach many experienced brewers swear by: sample one bottle each week starting at the two-week mark. You’ll discover your beer’s evolution firsthand, learning how different stages suit your palate. Some folks prefer the bright, fresh character at three weeks, while others appreciate the smoother profile that develops after six.
Temperature matters during conditioning too. Store bottles somewhere consistent, ideally between 60-70°F. Your beer won’t spoil sitting longer, but most homebrews peak within three months. After that, hop character fades and flavors gradually shift. That first perfectly carbonated, beautifully conditioned homebrew? Absolutely worth the wait.
Learning From Your First Batch (Even If It’s Not Perfect)
Here’s the truth: your first batch probably won’t taste like that hazy IPA you’ve been obsessing over from your local brewery. And that’s completely fine. Every brewer who now crafts award-winning beers started exactly where you are, with a batch that taught them something valuable.
Before you even crack open that first bottle, start a brewing journal. Document everything: the exact temperatures you hit during the mash, how vigorously your fermentation bubbled, any unusual smells or observations. When you finally taste your beer, write down what you notice. Too sweet? Note the final gravity reading. Slight butterscotch flavor? That’s diacetyl, telling you something about your fermentation temperature or yeast health. This isn’t just record-keeping; it’s building your brewing intuition.
Evaluate your beer honestly but kindly. Pour it into a glass, observe the clarity and head retention, smell the aroma, and taste it at different temperatures. Compare what you’re experiencing against the style guidelines you were aiming for, but remember that drinkable beer is a success, even if it’s not perfect.
This is where community becomes invaluable. Local homebrew clubs exist in nearly every city, filled with brewers who remember their first attempts and genuinely want to help you improve. Bring a few bottles to a meeting. These folks can identify off-flavors you might miss and offer specific solutions based on their own mistakes. Many clubs organize group brew days where you can watch experienced brewers work and ask questions in real time.
The commercial brewers you admire? Most started in their kitchens, making the same beginner mistakes you’re making now. They just kept brewing, kept learning, kept improving. Each batch teaches you something new about the science and art of brewing.
Congratulations. You’ve just brewed your first batch of beer, and that makes you part of something special. From ancient Sumerian brewsters to monks perfecting their abbey ales, you’re now connected to thousands of years of brewing tradition. More importantly, you’ve joined a community that genuinely loves sharing knowledge and lifting up newcomers.
Your beer might not be perfect. Your first batch rarely is. Maybe the hop balance isn’t quite where you imagined, or the carbonation is slightly off. That’s completely normal, and here’s the thing: you’ll still have brewed something that tastes good, that you created from grain and hops and your own hands. Pour yourself a glass. Share it with friends who’ll appreciate the story behind it. There’s genuine pride in serving something you made yourself.
The homebrewing community thrives on this kind of sharing. Visit your local homebrew club or online forums, and you’ll find experienced brewers eager to taste what you’ve made and offer constructive feedback without judgment. These are people who remember their own first batches and the excitement of watching those initial bubbles in the airlock.
Now comes the best part: planning your next brew. Maybe you’ll try a different hop variety, experiment with specialty grains, or attempt that beer style you’ve been thinking about. Each batch teaches you something new. Each brew day builds your confidence and refines your palate.
The fermenter you just cleaned? Fill it again soon. The craft brewing tradition you’ve joined celebrates continuous learning and improvement. Your journey as a homebrewer has only just begun.