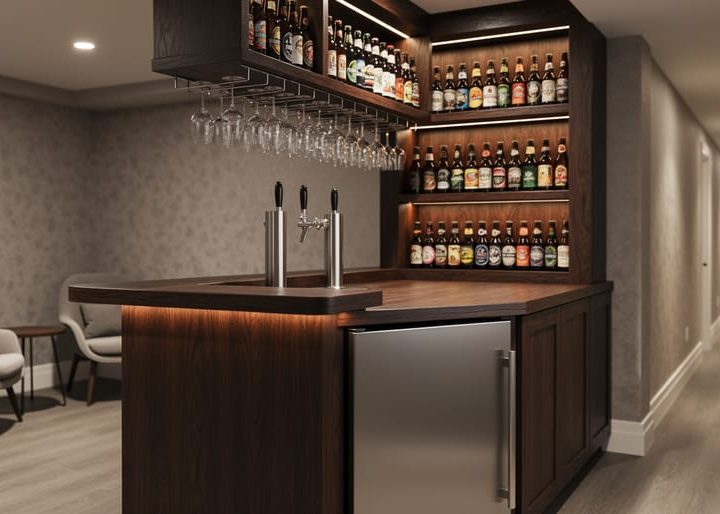
Building a functional basement bar in your Kitchener home requires three interconnected design priorities: a layout that encourages conversation and movement, storage that showcases your craft beer collection while keeping glassware and equipment accessible, and an atmosphere that transforms casual tastings into memorable gatherings. The project typically takes four to six weeks for a mid-sized space and demands moderate carpentry skills, basic plumbing knowledge for tap systems, and careful attention to local building codes.
The best basement bars don’t simply replicate commercial taprooms. They reflect the passion of homebrewers and craft beer enthusiasts who understand that proper glassware storage protects tulips and teku stems, that kegerator placement affects pour quality, and that display shelving for bottle collections becomes a conversation starter. Your space should balance the practical demands of a working bar with the welcoming feel of your favorite local brewery’s tasting room.
Kitchener’s thriving craft beer community has inspired countless basement builds, each solving the same core challenge: how to maximize limited square footage while creating zones for pouring, tasting, and socializing. The solution lies in strategic planning before the first board gets cut. Measure twice, design for flow, and prioritize the elements that matter most to how you share beer with friends and fellow enthusiasts.
This guide walks through the complete process, from selecting materials and understanding electrical requirements to installing tap systems and optimizing bottle storage. Whether you’re planning a compact tasting corner or a full entertainment hub as part of basement finishing for Kitchener homes the principles remain consistent: build for durability, design for experience, and create a space that celebrates the craft you love.
What You’ll Need: Tools, Materials, and Planning Essentials
Before you drive your first screw or pour your first pint, gathering the right tools and materials saves you mid-project headaches and ensures your basement bar can handle everything from casual tastings to full homebrew showcases. Think of this phase as brewing prep, you wouldn’t mash in without checking your grain bill and water chemistry first.
Start with planning tools that help you visualize the finished space before committing to construction. Graph paper works beautifully for sketching layouts to scale, but free design software like SketchUp or RoomSketcher lets you experiment with three-dimensional views and test different configurations. Measure your basement twice, noting ceiling height, support posts, existing plumbing access points, and electrical outlets. A laser measure delivers precision that a tape measure sometimes misses, especially for longer spans.
For the actual build, you’ll need a solid collection of carpentry basics alongside some specialized equipment:
- Planning phase: laser measure, graph paper or design software, stud finder, moisture meter for basement walls
- Framing and structure: circular saw, drill/driver set, level (4-foot and torpedo), speed square, clamps, safety glasses
- Bar top and finishing: miter saw for trim work, orbital sander, wood glue, finishing nailer, paintbrushes or foam rollers
- Plumbing additions: pipe wrench, basin wrench, PEX cutter if running new water lines, plumber’s putty, Teflon tape
- Electrical work: wire stripper, voltage tester, fish tape for running cables through walls, junction boxes
Material choices shape both your budget and your bar’s character. Hardwood like oak or maple creates a traditional pub feel and stands up to spills, while butcher block offers warmth that invites guests to lean in and stay awhile. Stone or quartz delivers durability for heavy use, think about how many pint glasses will slide across that surface during a bottle share. Composite materials like laminate keep costs manageable without sacrificing style, and reclaimed wood from local Kitchener sources adds craft beer authenticity you can’t buy off the shelf.
For plumbing, decide early whether you’re building a wet bar with a working sink or keeping it dry to simplify construction. A wet bar requires PEX tubing or copper pipe, shut-off valves, a small bar sink, and a drain connection to your main stack. Tap systems need their own consideration: a single-tap kegerator is plug-and-play, while a multi-tap setup involves CO2 regulators, beer lines, and potentially glycol cooling if you’re serious about serving multiple kegs at proper temperatures.
Electrical planning centers on refrigeration and ambiance. Standard outlets handle under-counter fridges, but a dedicated 20-amp circuit prevents tripping breakers when you’re running a kegerator, mini-fridge, and accent lighting simultaneously. LED strip lights, pendant fixtures over the bar top, and dimmable overhead lighting each need their own wiring strategy.
Safety and Building Code Considerations
Before breaking ground on your basement bar, you need to navigate Kitchener’s building codes and safety requirements. These aren’t bureaucratic hurdles, they protect your home’s structural integrity, your family’s safety, and your property value.
Start with permits. Any basement renovation involving electrical work, plumbing modifications, or structural changes requires a building permit from the City of Kitchener. You’ll submit your plans to the Building Division, pay the permit fee (typically $200-600 depending on project scope), and schedule inspections at key stages. Skipping permits might save time upfront, but it creates problems when you sell your home or file an insurance claim after water damage.
Electrical compliance is non-negotiable. Your bar area needs dedicated 15-amp circuits for refrigeration (never share a fridge circuit with other appliances), GFCI-protected outlets within six feet of any sink, and proper grounding for all metal fixtures. If you’re adding under-cabinet lighting or multiple appliances, your existing panel might need upgrading. A licensed electrician will calculate your load requirements and ensure code compliance.
Kitchener basements face specific moisture challenges due to our clay-heavy soil and freeze-thaw cycles. Before building, assess your basement’s waterproofing. Check for efflorescence (white powdery deposits on concrete), musty odours, or previous water stains. Address any moisture issues first, a dehumidifier rated for your square footage should maintain 30-50% humidity. Consider a sump pump if you don’t have one, especially in older Kitchener homes.
Egress requirements matter for safety and code compliance. Finished basement spaces need a secondary exit, typically an egress window with a minimum 3.8 square feet of opening. If your bar area will be used as a living space, verify you meet this requirement or plan to add one.
For homebrewers installing tap systems, CO2 safety deserves serious attention. Mount CO2 tanks securely to prevent tipping, ensure adequate ventilation (CO2 displaces oxygen in enclosed spaces), and install tanks away from heat sources. Use proper pressure regulators and check all connections with soapy water to detect leaks. While you can install draft systems yourself, hire a professional for gas line work if you’re adding a propane-powered setup.
The line between DIY and professional work is clear: you can handle finish carpentry, painting, basic shelving, and simple tap system assembly. Call licensed contractors for electrical panel work, new plumbing lines, structural modifications, and gas installations. It’s not just about skill, it’s about legal compliance and your family’s safety.
Step 1: Designing Your Bar Layout for Flow and Function
Bar Shape and Footprint Options
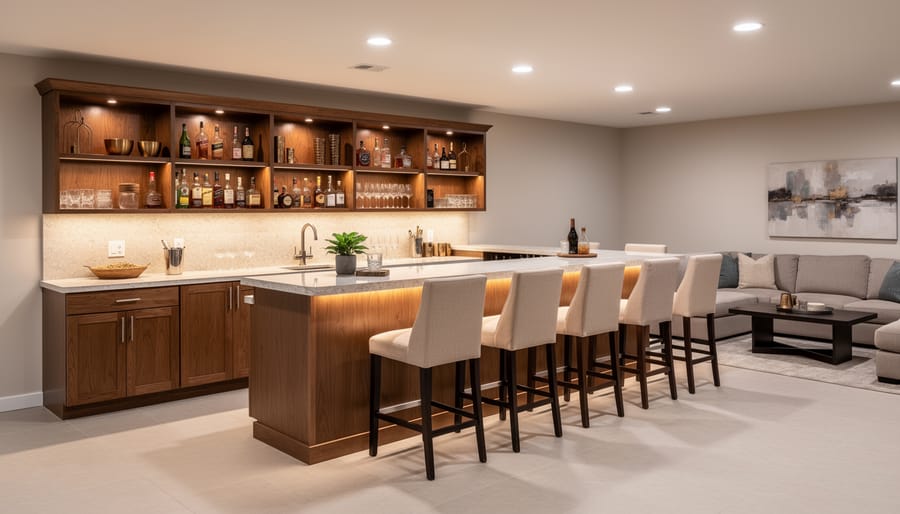
Each bar configuration creates a distinct entertaining dynamic and fits different basement geometries. An L-shape bar tucks neatly into a corner, maximizing floor space while providing two serving sides, ideal for smaller basements where you want dedicated bartender space without blocking traffic flow. This layout works brilliantly for homebrewers who need room behind the bar for kegs and equipment while still offering guest-facing seating.
A straight bar runs along one wall, creating the classic pub feel that encourages conversation across the bar top. It’s the most space-efficient option for narrow basements and puts your tap system and glassware on full display. The downside: limited seating capacity and everyone faces the same direction.
U-shape configurations turn you into the center of attention, surrounded by guests on three sides. This design demands serious square footage but rewards you with maximum seating and interaction, perfect for regular tasting parties. You’ll need at least 12 feet of width to avoid feeling cramped behind the bar.
A peninsula bar extends from a wall into the room, dividing spaces without closing them off. It’s the social butterfly of layouts, letting you engage with guests on both sides while maintaining visual connection to the rest of your basement entertaining area.
Seating and Circulation Space
Getting the spacing right around your bar makes the difference between a cramped corner and a genuine gathering spot. Each bar stool needs 24 to 30 inches of width, aim for the higher end if you’re accommodating guests with broader builds or winter layers common in Kitchener homes. More critical than stool width is the clearance behind them: allocate at least 36 inches from the back of the stool to the nearest wall or obstacle. This allows guests to slide in and out comfortably without asking everyone to stand.
For standing circulation around the bar perimeter, plan for a minimum 42-inch clearway. This prevents the awkward shuffle when someone’s carrying a flight of samples or heading to the kegerator. If your basement includes support posts or the furnace room door, map these obstacles during your layout phase and route traffic around them rather than through narrow gaps.
Consider creating distinct zones: a seated area at the bar itself, a standing conversation zone nearby, and a clear path to wherever you’re storing backup beer. Your regulars will naturally claim their spots, but thoughtful spacing ensures everyone can move freely when the tasting session gets lively.
Step 2: Building Smart Storage Solutions
Temperature-Controlled Storage
Incorporating temperature-controlled storage starts with understanding your power requirements. A standard kegerator draws 100-150 watts and needs a dedicated 15-amp circuit to avoid tripping breakers when compressors cycle. Position units at least two inches from walls for proper airflow, restricted ventilation forces compressors to work harder, shortening equipment life and raising energy costs.
Dual-zone beverage fridges work well for mixed collections, keeping lagers at 38°F while maintaining stouts at 50°F. Install these under the bar counter with front ventilation models, not standard back-vented refrigerators that overheat in enclosed spaces.
Kegerator placement demands extra planning. You need vertical clearance for CO2 tanks (typically 20 inches), plus access to swap kegs without dismantling your bar. Run a dedicated water line nearby if you’re adding a drip tray drain, though many homebrewers simply use removable trays they empty daily.
Consider heat output when clustering multiple cooling units. Three refrigeration systems in one corner can raise ambient temperature by 5-7 degrees, making your basement uncomfortable during summer gatherings. Space units apart or add a small exhaust fan to move warm air away from your entertaining zone.
Display and Organization Systems
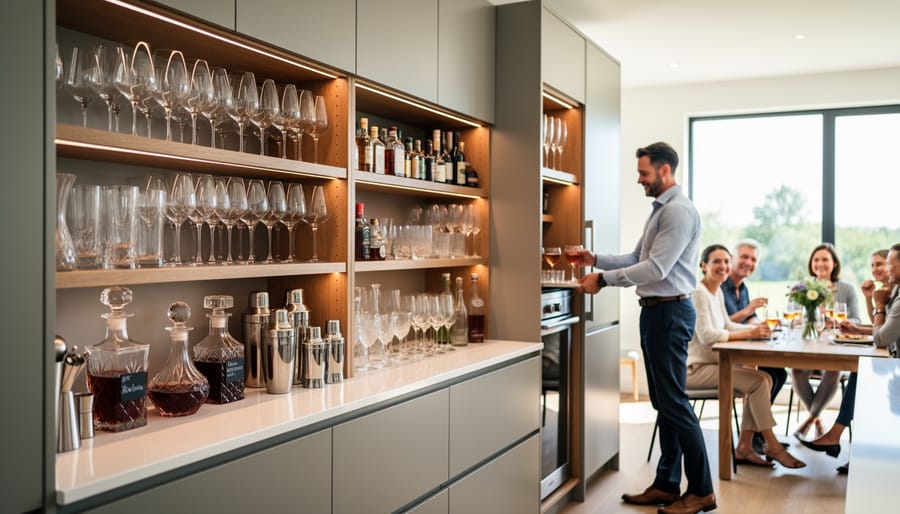
Your beer collection deserves better than hiding in a dark corner. Open shelving with LED strip lighting transforms bottles into glowing amber and golden displays while making labels easy to read. Install floating shelves at varying heights to create visual interest, position Belgian bottles at eye level where guests can admire the ornate labels, with domestic craft cans on lower shelves.
Glassware racks serve double duty as functional storage and brewery storytelling. Stemware holders mounted under upper cabinets keep tulip glasses and snifters within easy reach while displaying your collection of brewery-branded glassware. Group glasses by style, pilsner flutes together, stout glasses in another section, so guests naturally ask about the differences.
Tap handles deserve their own spotlight. A shadow box display case for retired or collectible handles becomes an instant conversation piece, especially when you include handles from now-closed Kitchener breweries or limited releases you brewed yourself. Magnetic knife strips repurposed as bottle opener displays add personality while keeping tools accessible. Label your shelves with small chalkboard tags noting beer styles or regions, turning your storage into an educational exhibit that invites questions and sharing stories about favourite brews.
Step 3: Optimizing Your Space for Entertaining
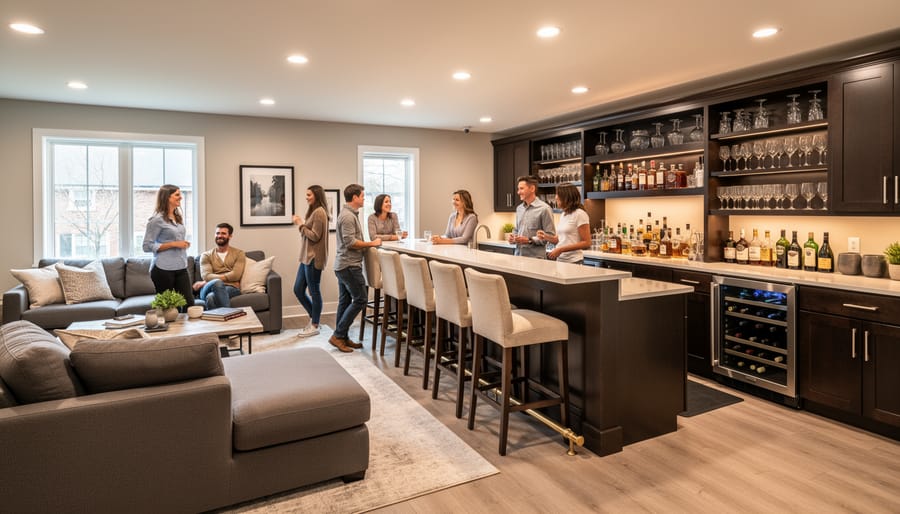
Creating the Right Atmosphere
The atmosphere you create separates a basement with a bar from a genuine craft beer destination in your home. Lighting sets the foundation, ditch harsh overhead fluorescents in favour of layered sources. Install dimmable pendant lights above the bar top for task lighting when pouring, add LED strips under shelving to backlight your bottle collection, and place warm-toned wall sconces to create intimate conversation pockets. Aim for 20-30 foot-candles at the bar surface and softer ambient light elsewhere.
Your bar top material shapes how guests interact with the space. Butcher block or reclaimed wood invites people to lean in and linger, developing character with each ring stain and conversation. Live-edge slabs spark storytelling. Sealed concrete or epoxy-resin tops embedded with bottle caps become instant talking points about the key ingredients and styles you love. Whatever you choose, ensure it is smooth enough for comfortable forearms and sized deep enough (24 inches minimum) that guests don’t feel crowded.
Sound matters more than homeowners realize. Add acoustic panels disguised as brewery art to prevent echo in typical concrete-walled basements. Position speakers to create even coverage without forcing conversation-killing volume. Consider a dedicated zone for a turntable or streaming system.
Visual focal points celebrate your craft beer journey. Frame tap handles from favourite breweries, display competition medals, or mount a chalkboard for rotating featured pours. These elements transform your bar from generic to unmistakably yours.
Step 4: Installing Plumbing and Tap Systems
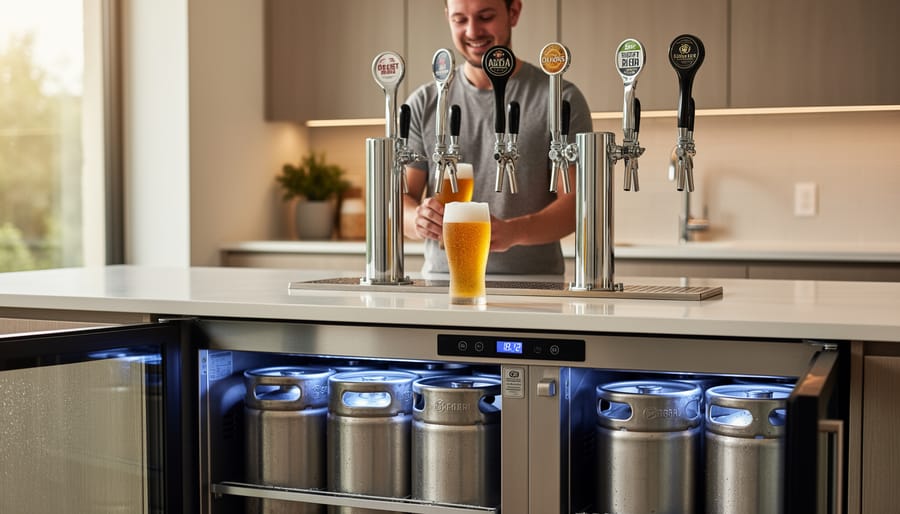
With the layout, storage, and atmosphere planned, it’s time to tackle the technical heart of your basement bar: plumbing and draft systems. This step separates a simple counter with a mini-fridge from a genuinely functional craft beer space.
Start by deciding between a wet bar (with running water and drainage) or a dry bar. A wet bar adds significant value for rinsing glassware and cleaning between pours, but it requires proper plumbing and drainage access. In Kitchener, adding new plumbing to a basement requires permits and inspection, this is licensed plumber territory. They’ll ensure proper venting, slope for drainage (minimum 1/4 inch per foot), and compliance with Ontario Building Code. If your basement already has a bathroom or laundry hookup nearby, tapping into existing lines becomes more feasible. A dry bar skips this complexity entirely; you’ll simply carry dirty glassware upstairs or use a portable basin.
For draft systems, a single-tap kegerator is the most DIY-friendly option. These self-contained units need only a standard electrical outlet and proper ventilation, keep the compressor at least three inches from the wall. Multi-tap systems require more planning: glycol cooling lines, longer beer lines (typically 3/16-inch diameter, five feet per tap), and balancing gas pressure across multiple kegs. Install your CO2 tank in an accessible spot outside the main entertaining zone but close enough for practical line runs, ten feet maximum to maintain consistent carbonation.
CO2 safety matters: secure tanks to the wall with a proper bracket, store them upright, and ensure adequate ventilation. A five-pound tank leaking in an enclosed space displaces oxygen quickly. Place tanks away from heat sources and never above 120°F.
If you’re planning to serve your first batch of homebrew on tap, invest in proper line cleaning equipment from the start: a pump, food-grade cleaner, and sanitizer. Dirty lines ruin even the best beer, and establishing a cleaning routine now saves headaches later.
Verification and Final Touches
Before you invite friends over to christen your new basement bar, methodically verify every system works as intended. Start with plumbing: turn on the sink and let it run for several minutes while checking underneath for any drips or pooling water around connections. If you’ve installed a draft system, pour a full glass from each tap and inspect CO2 lines, coupler fittings, and the drip tray drain for leaks. For homebrewers using municipal water, this is also the time to confirm your filtration setup can remove chloramine before it affects your next batch.
Test your electrical systems by running all refrigeration units, lights, and any entertainment equipment simultaneously. Check that circuits aren’t overloaded and that your GFCI outlets trip properly when tested. Verify your kegerator or beer fridge maintains stable temperatures, most craft beers serve beers at 38-55°F depending on style, so confirm your system holds steady in that range without wild fluctuations. Run ventilation fans for an hour to ensure adequate air circulation, especially if you’re storing CO2 tanks.
- Run all taps and check every plumbing connection for leaks
- Test electrical load with all appliances running simultaneously
- Monitor refrigeration temperatures over 24 hours
- Verify CO2 tank connections and pressure settings
- Confirm adequate lighting at the bar top and in storage areas
- Test any entertainment systems (screens, speakers, streaming)
Now for the rewarding part: stock your bar with a thoughtful first selection that reflects Kitchener-Waterloo’s craft beer diversity. Organize glassware by style, tulips for Belgian ales, pilsner glasses for lagers, snifters for barrel-aged stouts, so grabbing the right vessel becomes second nature. Create a simple beer menu board listing what’s on tap and in bottles, including tasting notes or ABV to guide guests. Invite a few trusted friends for a dry-run session where you can identify workflow bottlenecks: is the bottle opener within reach? Can two people work behind the bar comfortably? Does the kegerator door swing freely when guests are seated? This rehearsal reveals practical adjustments a blueprint never could. Building a basement bar supports your healthy lifestyle balance by creating a controlled space to enjoy craft beer socially without always heading out.
Common Questions About Building a Basement Bar in Kitchener
Building a basement bar in Kitchener comes with region-specific considerations that homeowners consistently ask about. Understanding these local factors, from municipal requirements to climate challenges, helps you plan more accurately and avoid costly surprises.
What permits do I need and how much do they cost in Kitchener?
Most basement bar builds require a building permit from the City of Kitchener, typically costing $150-$400 depending on scope. If you’re adding plumbing or electrical work, separate permits may be required, and these often need licensed contractors to pull them.
How long does the permit approval process take?
Kitchener’s building department typically processes standard basement renovation permits within 10-15 business days, though complex projects involving structural changes can take 4-6 weeks. Submit your plans early to avoid construction delays.
What’s a realistic budget for a basement bar in Kitchener?
Basic DIY builds start around $2,000-$3,500 for a simple dry bar with basic storage. Mid-range projects with plumbing, quality materials, and a kegerator run $5,000-$10,000, while custom builds with multiple taps, premium finishes, and extensive storage can exceed $15,000.
How do I handle Kitchener’s basement moisture issues?
Many Kitchener homes experience basement dampness due to the region’s clay soil and water table levels. Install a vapour barrier behind your bar, use moisture-resistant materials like marine-grade plywood, and ensure proper drainage and dehumidification before finishing.
Where can I source reclaimed brewery materials locally?
Contact established Kitchener-Waterloo breweries about decommissioned equipment, old tap handles, or reclaimed wood from barrel programs. Local salvage yards and Habitat for Humanity ReStore locations often carry materials perfect for creating a bar with character that honours Canadian beer history.
Winter brings additional considerations for Kitchener basement bars. If your design includes external venting for a kegerator or CO2 storage, insulate vent lines to prevent freezing and condensation issues. Some homeowners winterize by routing CO2 tanks indoors and ensuring heated spaces surround any plumbing runs to exterior walls.
The local homebrewing community offers tremendous design inspiration and practical advice. Groups like the Kitchener-Waterloo Homebrewers Guild host meetups where members showcase their basement brewing and bar setups. Visiting these spaces provides real-world examples of what works in similar homes and basements, plus you’ll gain insights on managing tap systems, keg rotation, and entertaining flow from people who’ve already solved these challenges.
Building a basement bar in your Kitchener home is more than a renovation project. It’s an investment in the craft beer community you’re helping to build, one pint at a time. The space you create becomes a gathering place where homebrewing techniques get debated, local brewery stories get shared, and new friendships form over perfectly poured drafts.
Start with solid planning. Measure twice, build once, and don’t rush the details that make your bar uniquely yours. Whether you’re installing a four-tap kegerator or displaying competition ribbons from past homebrew contests, let your space tell your craft beer story. The layout choices you make, the storage solutions you build, and the atmosphere you create all reflect your journey from first homebrew batch to seasoned enthusiast.
Your basement bar will host countless conversations about hop profiles, fermentation temps, and which local breweries are pushing boundaries. It becomes the place where you share what you’ve learned and discover what others know.
We’d love to see what you build. Share your basement bar projects, layout solutions, and entertaining spaces with the Craft Brew Collective community. Your insights might inspire the next great Kitchener home bar.